
The sensitive nature of PCR allows scientists to extract and amplify useful DNA profiles. However, this high level of sensitivity can also create problems because the wrong template can be amplified. In this blog entry, we are going to explore some tips to have in mind to include in our protocol.
- 1) Introduction
- 2) Laboratory construction
- 3) Unidirectional Workflow
- 4) Pipetting Technique
- 5) Frequently Changing Gloves
- 6) Aseptic Cleaning Technique
- 7) Include controls in your protocol
1) Introduction
 One of the great advantages of PCR is its exquisite sensitivity. Starting with small fragments of nucleic acid (primers or oligonucleotides), more than 10 million copies of RNA or DNA molecules can be synthesized from a few copies of target sequence after only 32 cycles of amplification [1]. The sensitive nature of PCR allows scientists to extract and amplify DNA from raw samples to obtain useful DNA profiles. While this level of sensitivity works in a lab’s favor, it can also create problems if care is not taken to avoid contamination with other templates and amplicons (amplified DNA product from a previous amplification) that may be present in the laboratory environment. These contamination issues can result in the wrong template being amplified, i.e., false positive results. In this blog entry we are going to show you 6 tips to consider during your PCR protocol.
2) Laboratory construction
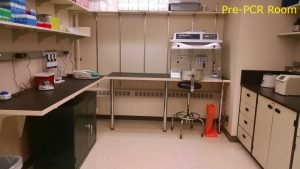
Contamination prevention starts with the distribution of the areas of a PCR laboratory. At a minimum, two areas should be designated for PCR testing: Pre- and Post-PCR. One room or area should be designated specifically for Pre-PCR. Optimally, this room should be further divided into two areas, PCR master mix preparation and sample preparation/addition to master mix.
- Sample preparation may involve a manual or automated extraction. Consumables and small equipment (mini-centrifuge, vortex, pipettors, tips, and tubes, etc.).
- The room should also include the extraction & purification DNA kits. Here you have a selection of our Blirt kits for purification of DNA and RNA.
- Finally, there should be one dedicated refrigerator/freezer for kit storage and another for storage of samples.
As mentioned before, a second room – or bench – (Post-PCR) should be established for post amplification steps and analysis. This room should be physically separated from the pre-PCR room. The post-PCR room is where the thermal cyclers for amplification and any instrumentation needed for post-PCR analysis. In this area we will perform all the steps that require manipulating open tubes after PCR amplification. This room should also include house consumables and small equipment (mini-centrifuge, vortex, pipettors, tips, and tubes) needed for post-PCR preparation.
3) Unidirectional Workflow
The workflow of a molecular lab should continue in one direction only, i.e. Pre-PCR > Post-PCR. PCR master mix reagents and samples that may contain templates for PCR should be prepared in the pre-PCR room only. Tubes that have undergone amplification in the post-PCR room contain amplicons (amplified template) and should never, under any circumstances, be opened or introduced in the pre-PCR room. Amplicons can serve as template for future PCR reactions and therefore could easily contaminate PCR or sample preparation reagents, consumables, or equipment.
This means that consumables and PPE (lab coats, gloves, goggles, etc.) that have been introduced into the post-PCR room should never be placed back in the pre-PCR room without thorough decontamination. When moving from room to room, a lab tech must remember to change PPE. Ideally, technologists who have worked in Post-PCR should not go back and work in Pre-PCR. If one must go against the unidirectional workflow, care should be taken to change PPE.
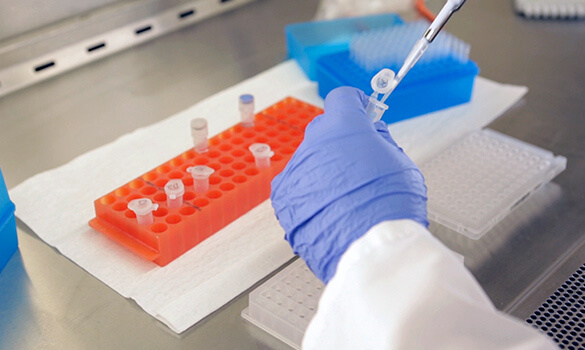
4) Pipetting technique
In any molecular assay, proper pipetting technique is critical to the performance and quality of your results. Moreover, correct pipetting technique can minimize contamination between samples that can lead to false positive results. Proper pipetting technique ensures that the accurate volume is aspirated and dispensed and avoids splashing when dispensing liquid. Open and close all sample tubes and reaction plates carefully so samples don’t splash out. Spinning tubes/plates before opening can prevent aerosols when opening tubes.
5) Frequently changing gloves
A lab technician should always wear fresh gloves when working in a PCR area. Change gloves frequently, especially if you suspect they have become soiled with solutions containing template DNA.
6) Aseptic cleaning technique
Is recommended to perform a proper aseptic cleaning should be carried out periodically before and after PCR work. This applies to all work surfaces including bench tops, pipettors, fridge/freezer handles, and any other touch points. We recommend wiping down and soaking these surfaces using 10-15% (0.5-1% Sodium Hypochlorite) bleach, made fresh daily.2 After fifteen minutes, use a DI water-dampened paper towel to remove bleach residue. This can be followed by a 70% alcohol dampened paper towel to help quickly dry the surfaces. Another solution could be to use the kits from Minerva Biolabs for descontamination. You can have a look on this clicking here.

7) Include controls in the protocol
A good practice is to include a positive control to ensure the extraction and amplification process correctly. In addition, it is completely necessary to include our negative control protocol or Control without template (NTC), that is, a control that does not contain a sample. This control serves to verify the absence of contamination in reagents, consumables and the environment.
One comment on “6 Ways to Minimize Contamination during PCR”
Get blog our
click on the given link to read more such post. https://getblogour.com/crispr/
thank you.